foundation
The History Of Photography
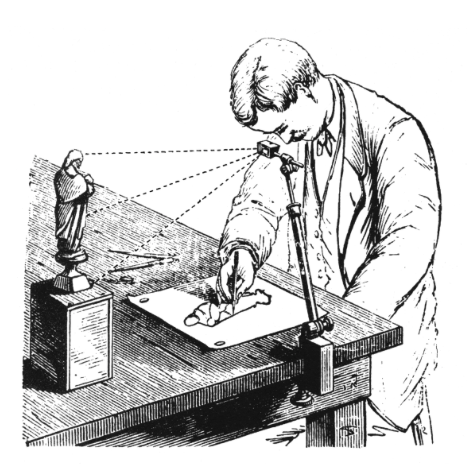
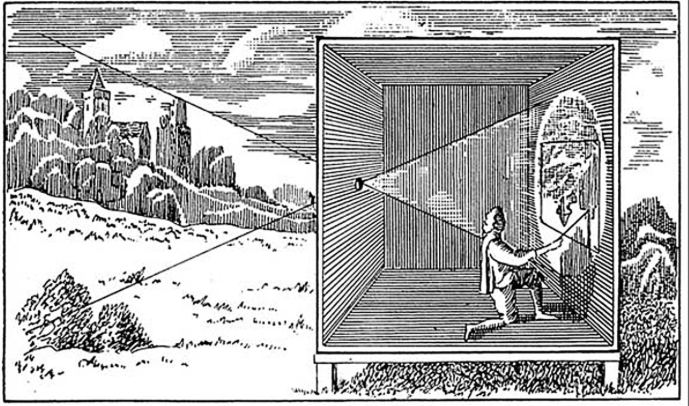
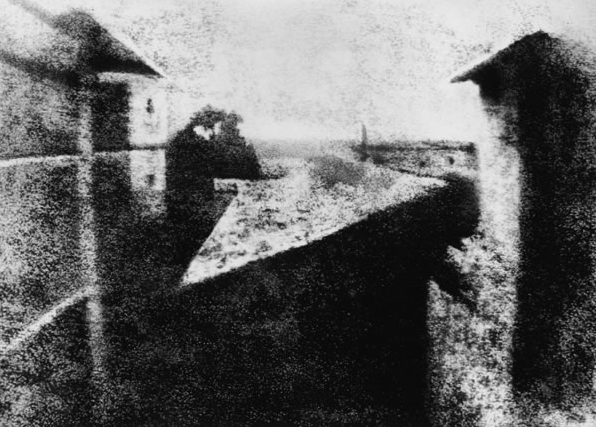
An obsession with being able to realistically present the world around them drove artists and innovators of the 15th century to design the Camera Obscura. This enabled them to project an inverted image, depicting the world outside, onto a wall in a dark space. This then evolved into the Camera Lucida, a portable version of the Obscura, which was effectively used, much like it's predecessor, by artists to cast a desired image onto a surface to then trace. The concept of the apparatus' were so successful and valued that renowned artists such as Vermeer are believed to have used them. The industrial revolution of the 1700/1800s introduced new materials, chemicals and global support which made it possible for artists and scientists to progress within the world of photography. In the 17th century Niepce successfully fixed a projection for the first time using a pewter plate and a form of asphalt. With the introduction of this new technology came a race to discover the next step towards photography as we know it today. The Daguerreotype and Calotype were invented in the 17th century by french and english rivals of the industry. Both were types of photographs, the Calotype could be reproduced unlike the Daguerreotype however was of a lower quality and so was favoured less. Although at the time the french image was seen as superior, both creations played a large part in the progression of photography. The ideological aspect of photography advanced alongside the practical, artists began to move away from the typical portraits presenting power and wealth that were preferred before the 17th century and instead used photography as a form of self expression. With photographs capturing subjects so precisely, artists were left to develop more experimental styles in terms of painting, drawing, etc such as Impressionism. Many took inspiration from the photograph and began to focus on specific elements such as light and colour, this resulted in the simultaneous evolution of painting alongside photography.
Ten pictures
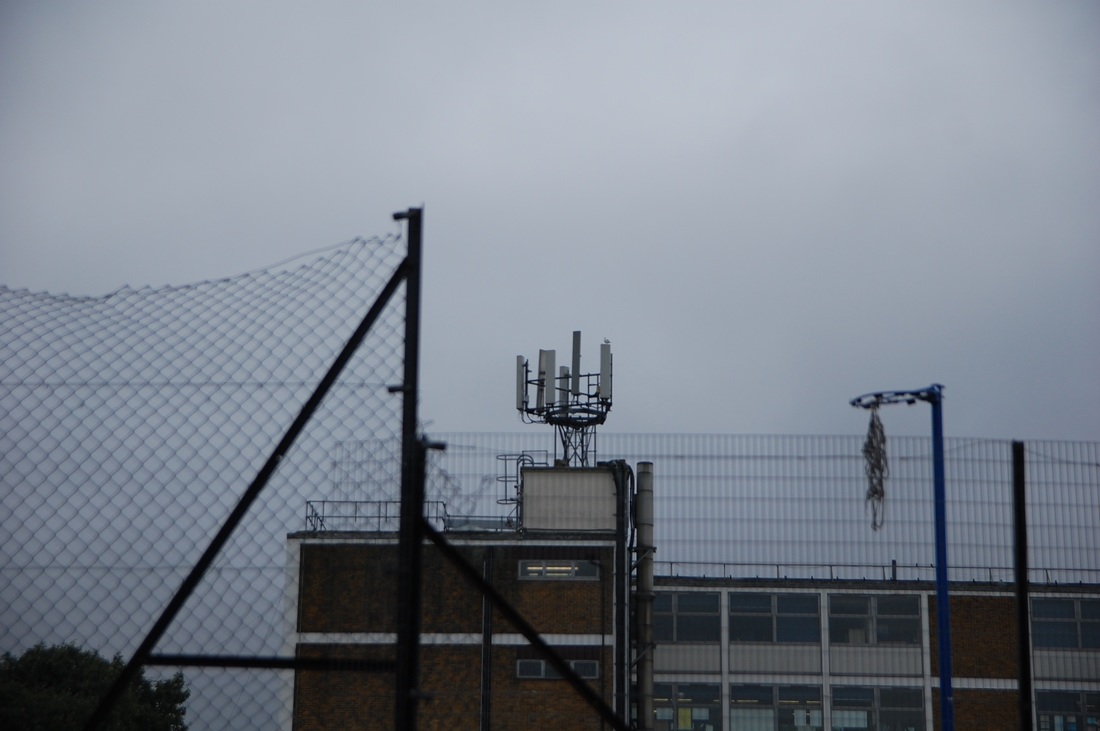
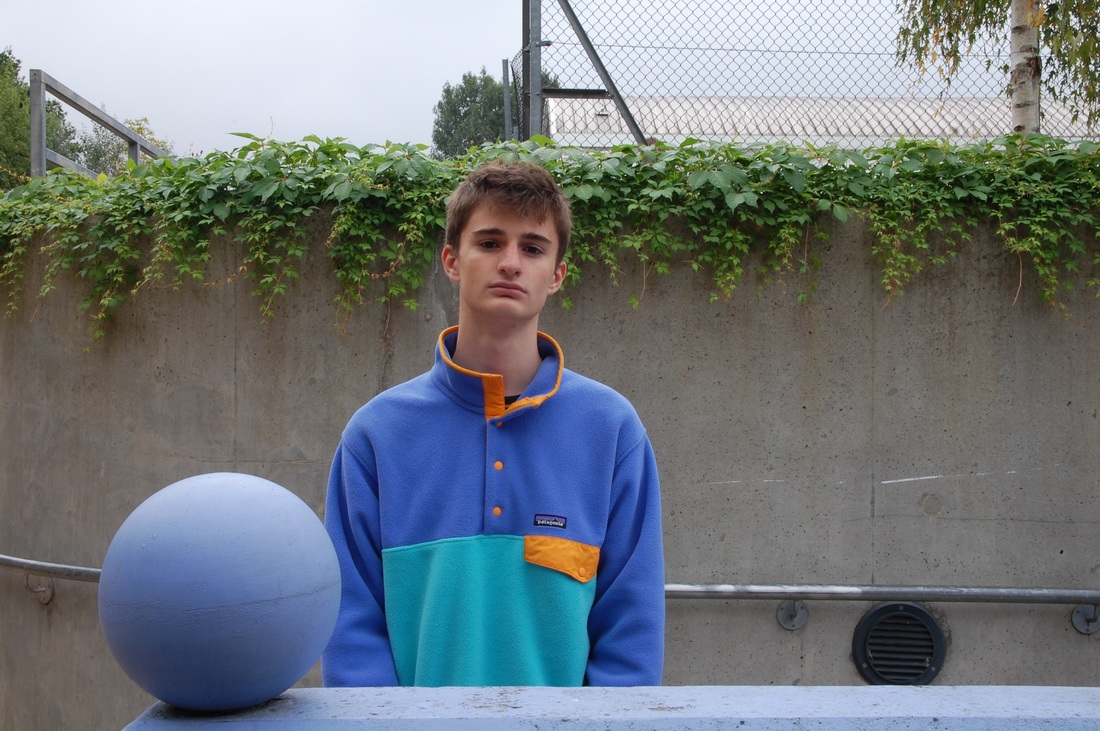
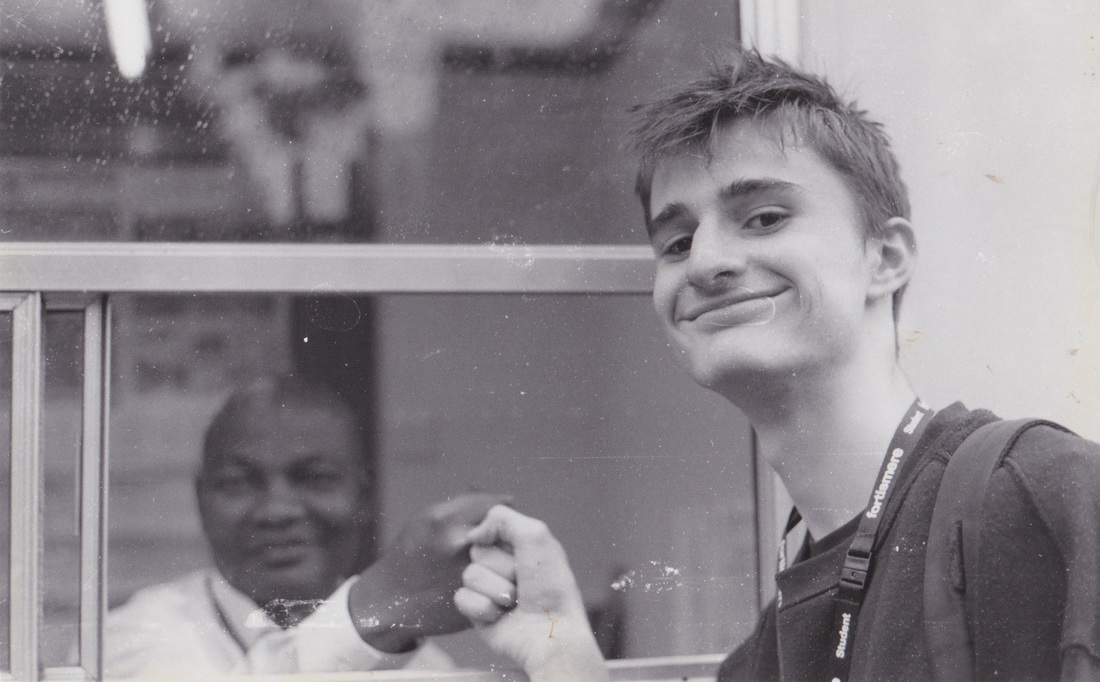
My pictures often feature contrast. For example architecturally- the polarity of new and old. I like having defined differences in my pictures as I feel they help to frame certain aspects of an image whist working together as part of the overall composition. I'm also drawn to lines that occur naturally between different objects, buildings, people, etc. For example in my picture below of Liverpool at night, with the parking sign and radio city building. The different elements which are so separate and distinct from one another, come together at that angle as if placed purposefully. Lastly, I enjoy taking pictures of people as I feel they are very ambiguous in terms of purpose which therefore leaves the viewer to interpret and settle on a meaning.
the photograph by graham clarke
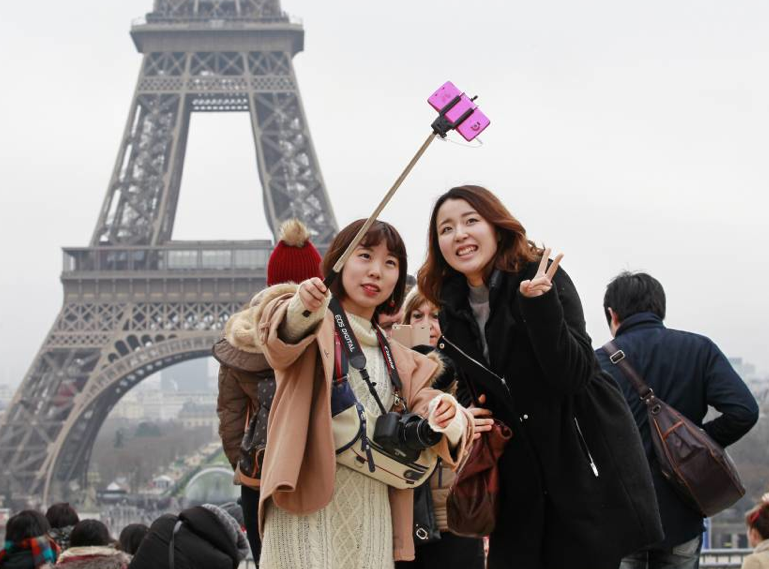
The first chapter of Clarke's 'The Photograph' assesses the way in which we view photographs and how their size, colour, shape, etc affect the message an image portrays and the importance attached to said message. For example Clarke states that images in black and white are perceived as more bona fide and as a result their message is determined more significant and valuable. Perhaps this is because the colour in a picture may retract from it's sole purpose, be that to inform, educate, stimulate thought,etc. Therefore an image devoid of colour is able to more effectively communicate its message and is subsequently more powerful. This also applies to the size of a print, there has always been a direct correlation between size and status, dating back to some of the earliest portraits- the bigger, the more influential. This can be shown both in and by a photograph, for example a feature of an image may outsize others, suggesting either the importance demanded by the feature itself or the importance attributed to it by the photographer. Another way is by the size of the actual photograph. In a gallery, the largest print is likely to demand the most attention and therefore be seen as formidably important. Clarke raises the point that the photograph is now so readily available as a medium that it has separated into two forms- art and then a mass produced object. The distinction varies depending on the individual viewing it, however photography as a mass produced object tends to be visual records a person may capture on their phone whilst on holiday or with their friends, that they now with the presence of social media, share with the rest of the world. Photography in terms of art, in the conservative sense of the word, means something far more calculated and perhaps staged, a form of self expression with the intention of making an audience think and reflect.
Photography of today
Photograms
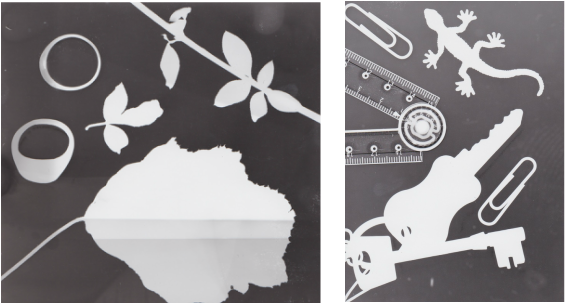
By placing objects on photographic paper and then exposing it to white light you are able to create a silhouette-like image called a Photogram. The items protect areas of the paper from the light which results in a black (gradient dependent on length of exposure and brightness of light) sheet with white outlines of the objects.
Double exposure
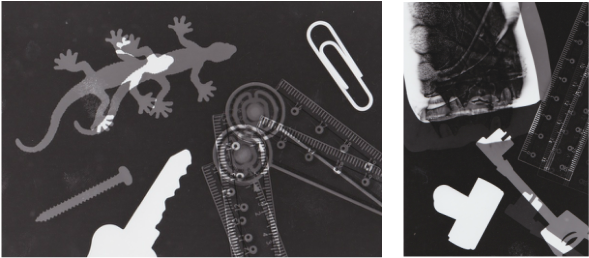
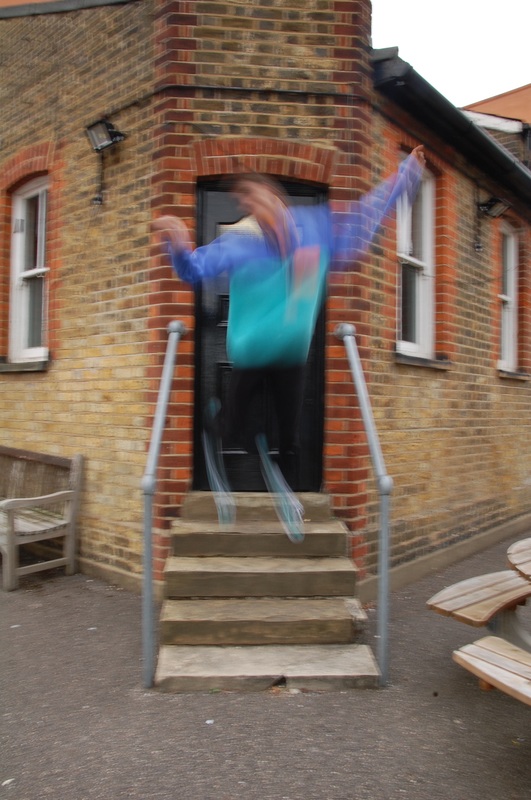
You can also do a double exposure by arranging the items once, exposing the paper and then rearranging them and exposing it for a second time. This creates a ghostly effect and the illusion of movement.
painting with developer
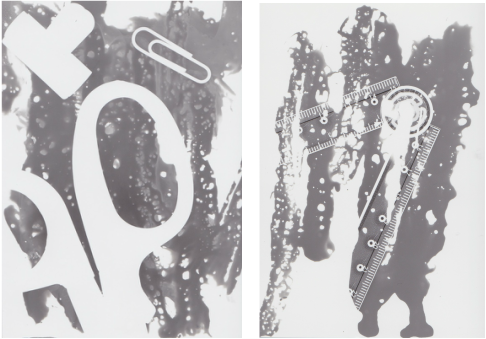
Another way you can achieve a more interesting end result is by painting developer onto the paper once it has been exposed, with or without the use of objects. This results in an uneven development with a watercolour-like effect. Once you have exposed the paper you must place it in developer to draw out the image. Once this is done you place it in stop followed by fix. You then wash it in cold, running water and then dry it.
solarisation
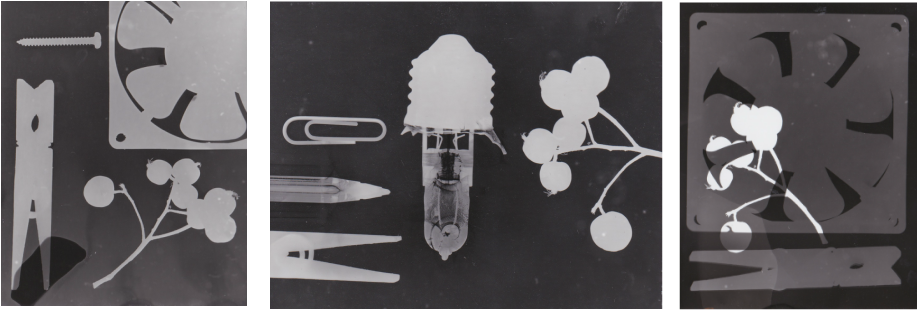
Solarisation is the process where in which you expose photographic paper, put it in developer but remove it and expose it again as soon as you see the image start to appear. This creates a silvery effect where in which shapes are given almost glowing outlines.
PinHole camera
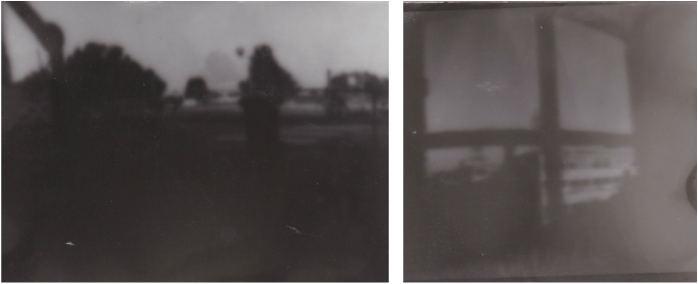
Pinhole cameras are lensless cameras with small apertures which allow a scene to be inversely projected onto photographic paper. They are believed to date back to the 4th and 5th century with documentation from Aristotle referencing pinhole images. It was difficult taking pictures with a pinhole camera because I was unsure as to how long I needed to expose the film in order to capture the image, so it was very much a matter of trial and error.
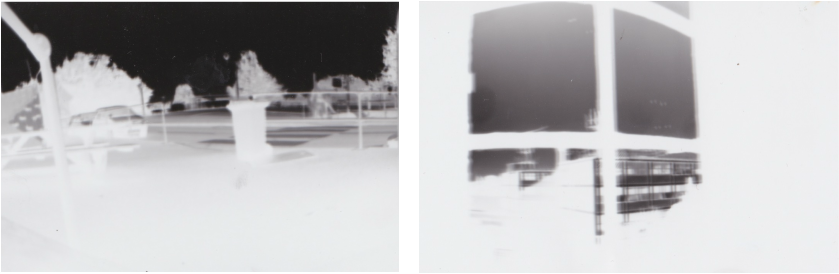
sandwich print
Pinhole images are initially formed as negatives, however by doing a sandwich print you are able to obtain positives. To do this you place the negative on top of undeveloped photographic paper and flatten both with printing glass. Next you expose the layered pieces of paper to bright, white light. Once this is done you develop the plain sheet of paper and a positive version of the pinhole image will form. My pinhole images were overexposed and so my sandwich prints are very dark. To produce better prints I need to experiment with a range of exposures in an attempt to create an image with defined components and therefore more successful sandwich prints.
The slr camera
An SLR (single lens reflex) camera allows the photographer to view exactly what the lens can see as they have a viewfinder and contain reflex mirrors. When the shutter is pressed the mirror moves out of the light path which allows light to travel through a light receptor where the image is captured. When using an analog SLR you must pay attention to the aperture, shutter speed and ISO, adjusting them according to the light and your subject, in order to take a successful picture.
Aperture, shutter speed and ISO
|
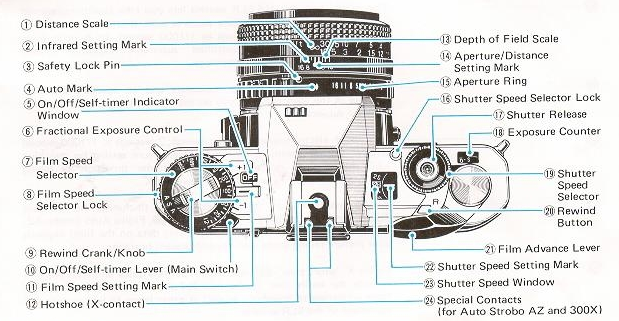
An SLR camera
|

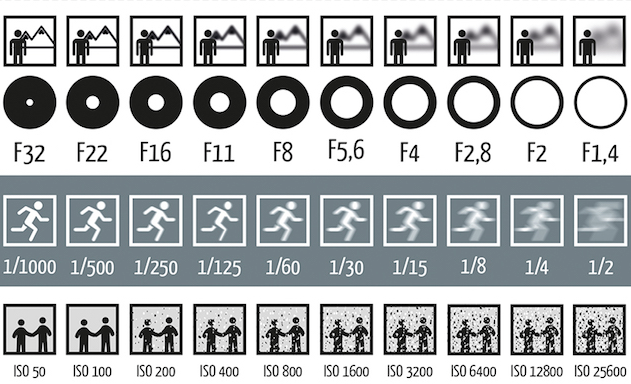
Aperture
Aperture is the hole which light passes through in a camera. By increasing the size of the hole you allow more light in, this is done by having a low f-stop and a high f-stop decreases the size of the hole and therefore lets less light in. When taking a picture in a place with low lighting you have a low f-stop to ensure as much light as possible is illuminating the subject and the opposite in a well lit place. Aperture also has an affect on the depth of field of an image. The smaller the f-stop (wider aperture), the shallower the depth of field and the bigger the f-stop (smaller aperture), the deeper the depth of field.
f/2.8
f/2.8
|

f/22

f/22
|
Shutter speed
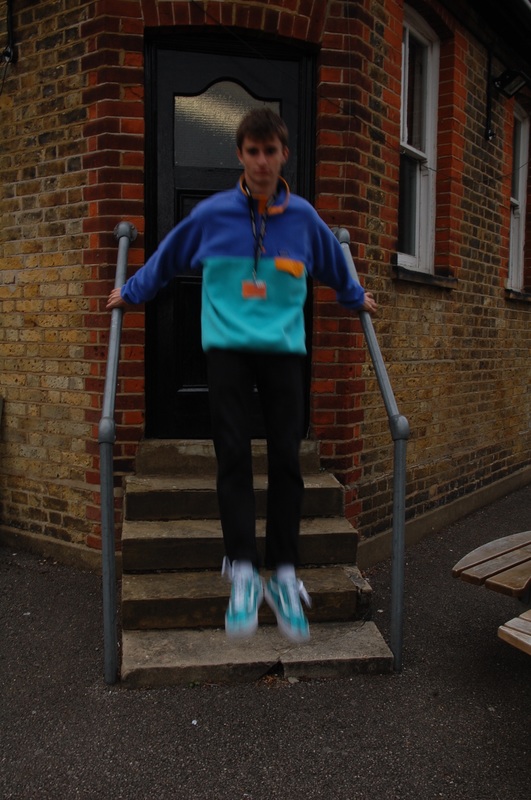
Shutter speed is the length of time the shutter is open, allowing light through to the sensor. A slow shutter speed results in the blur of moving objects whilst a fast shutter speed captures them, making them appear frozen. Shutter speed is measured in fractions of a second, for example 1/8 means an eighth of a second.
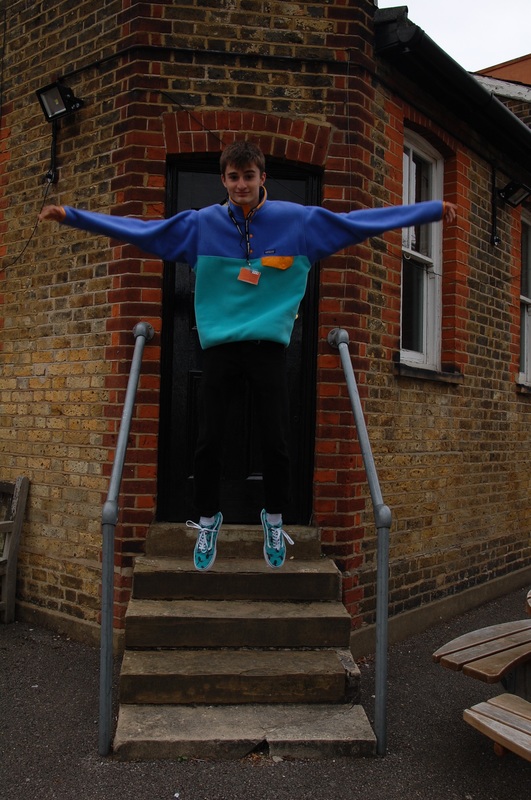
1/160
|
1/50
|
1/8
|
Developing film
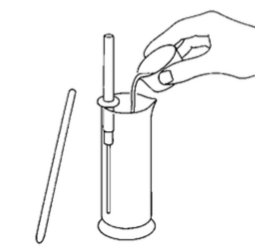
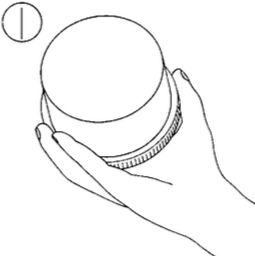
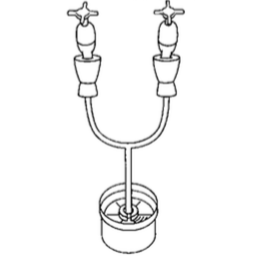
After shooting with an analog camera you need to develop your film. First of all you need to wind the film around a developing reel (1), however this must be done in complete darkness as the film is sensitive to all light. Once the film has been wound and cut from the cassette spool place it in a developing tank (2), the film is now protected from light and ready to develop. Next mix your developer, stop and fix to the right quantities (3)- this is dependent on the type and amount of film. Once this is done pour the developer into the tank (4) and start the timer (for 35mm film you must wait for 9 minutes 25 seconds), agitating and tapping the container every minute (5) to ensure the entire film is covered and to dislodge air bubbles. When the time is up, pour out the developer. You can now decant the stop into the tank, setting a timer (for 2 minutes if it's a 35mm film), agitating and tapping the container every minute as you did with the developer. Finally, once the stop has been removed, pour in the fix and carry out the steps from before. Finally, wash the film under running water (6) for 5-10 minutes, emptying and refilling and then hang to dry (7).
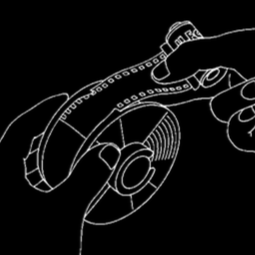
1
|
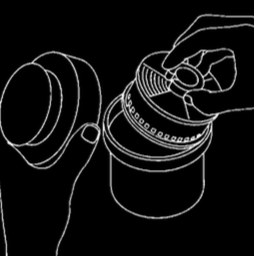
2
|
3 (repeat for each of the chemicals)
|

4
|
5 (repeat step 4 and 5 for each of the chemicals)
|
6
|
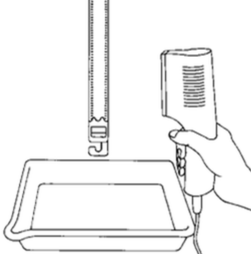
7
|
Printing
Once your film has been developed you must do a test strip in preparation for your contact sheet. To do this you first cut your film into rows of 3/4 images and secure them in a negative storage sheet. Now place a narrow strip of photographic paper under the negatives in the darkroom. Place a sheet of printing glass on top and position a piece of black card so that only the top of the photographic paper will be exposed to white light. Set the timer on the enlarger to 1 second, once this time is up move the black paper down slightly and start the timer again. Do this 6-8 times. Now develop the test strip and dry, you should have images with a steady gradient going from almost black (area exposed for longest) to white (area exposed for least time) of part of your negatives, this is due to the different exposure times. The strip of colour that shows the images as most defined (tends to be a dark grey/black) is the time you should use for your contact sheet. Now, using a larger sheet of photographic paper, place the rows of negatives on top as you did before along with the printing glass. Set the timer to the number of seconds you chose after looking at the test strip, then expose, develop and dry the paper. This is your contact sheet. You can now select the best photo/s to enlarge. To enlarge a negative you must slot it into the film carrier and position a strip of photographic paper underneath the projected image in order to do a test strip, use the focus and elevation knob to focus the image. Once you have completed a test strip and decided on how long you should expose the paper for, place a larger sheet of photographic paper on the easel. Once again use the focus and elevation knob to ensure the projected image is sharp and that it all fits onto the sheet of paper. Now, expose the paper for the time you decided based on the test strip. You can now develop and dry the enlarged photograph.
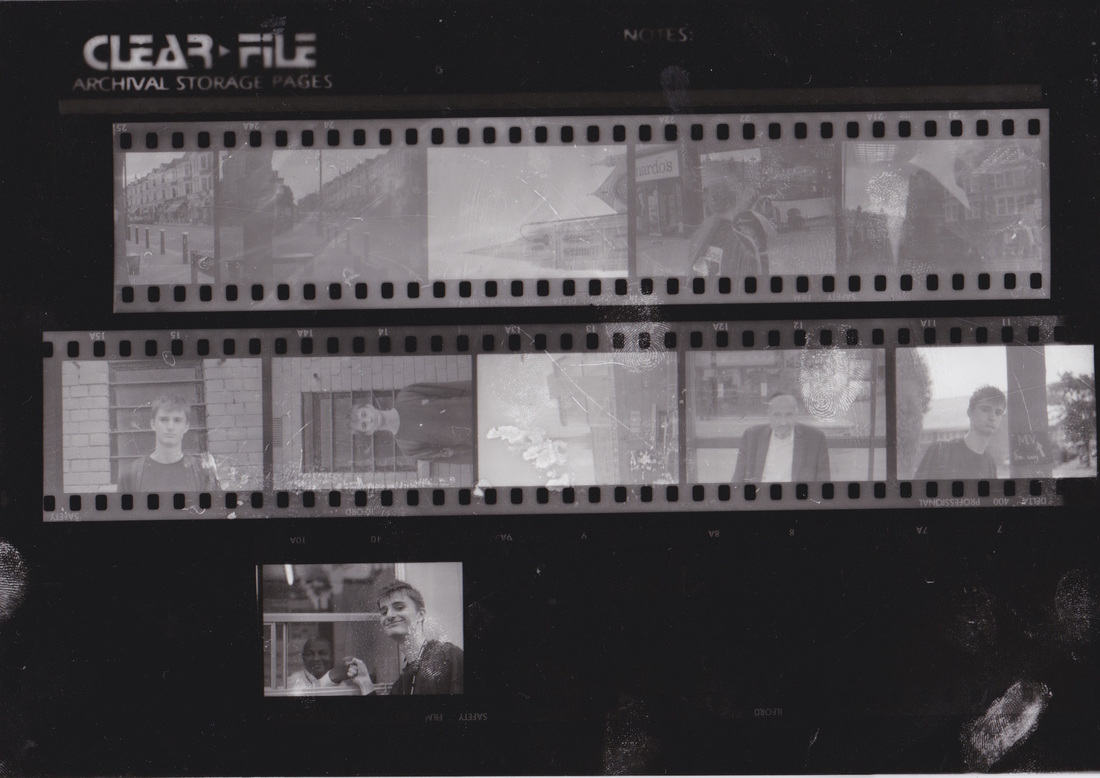
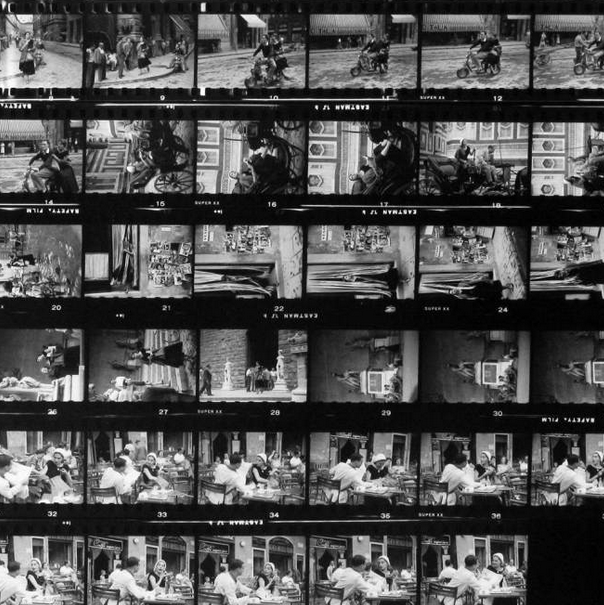
Contact sheet
|
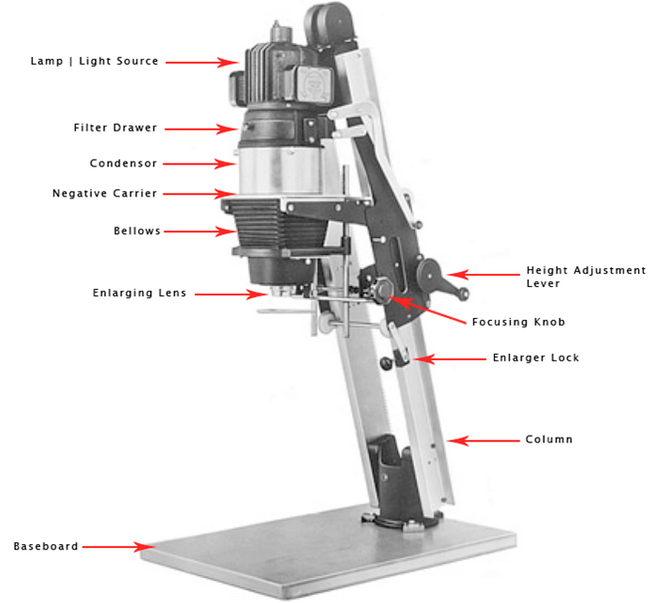
Enlarger
|

Test strip
Enlarged final image
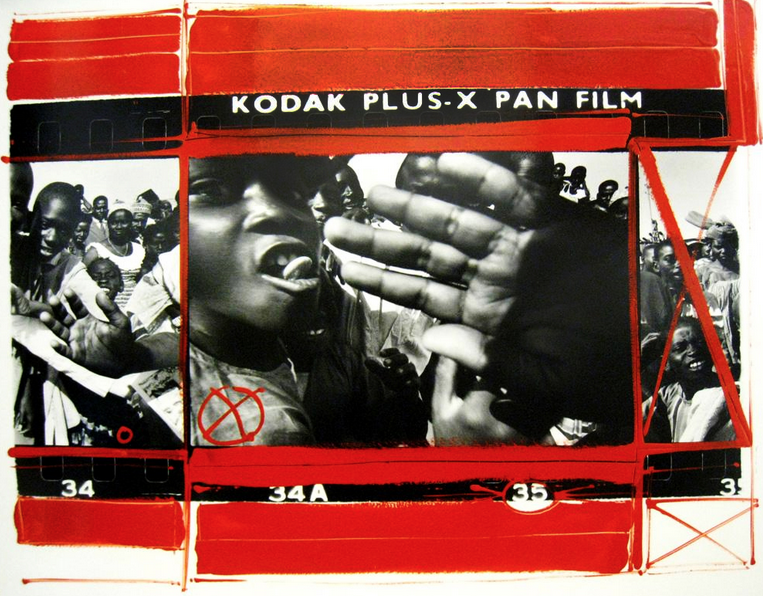
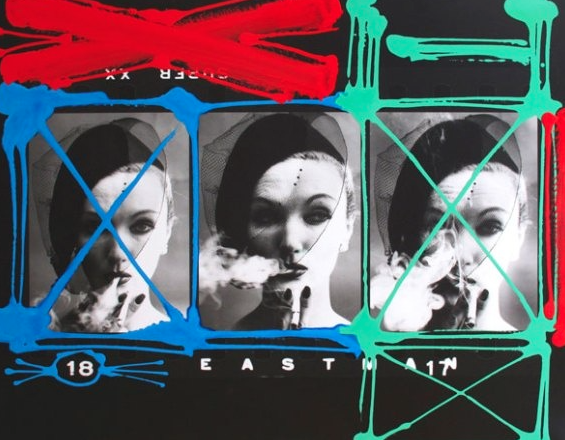
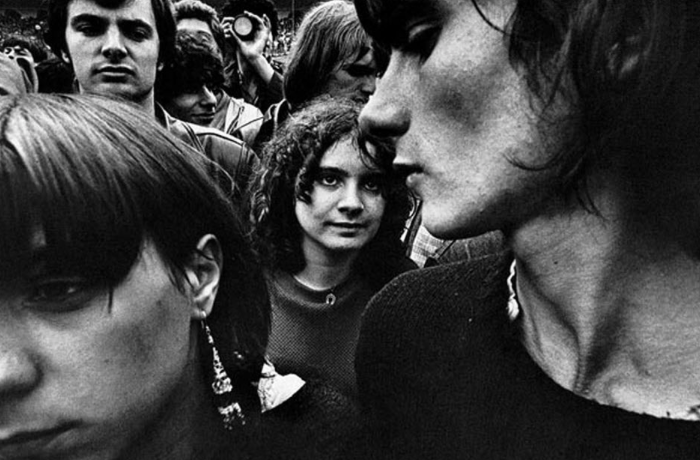
william klein
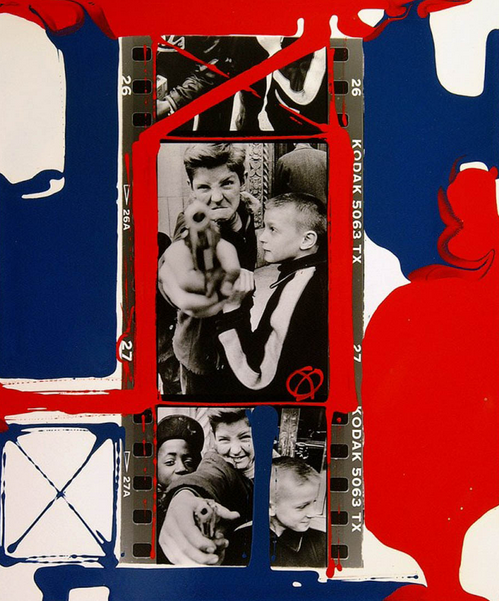
William Klein is renowned for his street photography, particularly for capturing the life of people in some of the biggest, busiest cities such as New York in the 1950's. Klein produced hard-hitting, raw images that were as effective together, in a contact sheet, as they were alone. The photographer became very much intrigued by the idea of time in relation to his career, focussing on the idea that he may select one negative from a large series to enlarge- the image having taken less than a second to capture and yet is the only one out of minutes worth of film that illustrates what Klein wanted to capture. This led to a series in which Klein used vibrant paint to demonstrate the editing process that all film photographers experience. Resulting in a powerful collection of some of his most acclaimed work framed by versions of the same moment that for whatever reason Klein did not see fit to represent that space in time. Klein's work has inspired me to experiment more with film. Although the process that comes with shooting on an analogue camera is more challenging I feel as though the reward is greater when you produce a successful image and so is more worthwhile. The ease at which you can manipulate film also interests me, such as Klein's method of painting on negatives. I may experiment with paint, acid and cutting negatives before I develop them in the hope that the product could be used as part of my series inspired by abstraction.
|
|
